

Stained Glass Snowflake
- Krista Moser
- Jan 18
- 2 min read
Updated: Jan 19

This week, I made use of more scraps and ended up with the neatest stained glass snowflake!


I gathered up all my lightest blue scraps and cut 1½” triangles from them. I used the Tiny ruler for this project because it cuts up to 3½”, and that is all I needed!


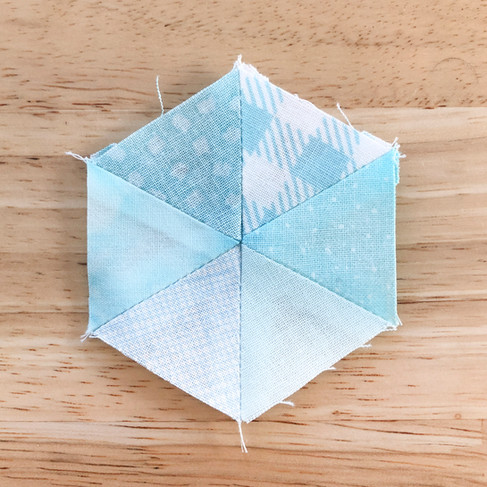
Arrange six of the triangles into a hexagon, as shown, and sew them together into two halves with three triangles in each half. Sew one final seam up the middle to join the two halves, and press the seams open.


Add one last triangle to one edge of the hexagon to turn it into a jewel shape.
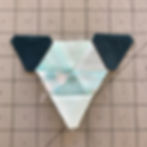
Cut more 1½” triangles from the background color and sew one to each corner, turning the jewel shape into a triangle. This triangle should measure 3½” from the tip to the top edge. Make twelve units like this.

Sew two of those units to each other to create a diamond unit, as shown here. Press the center seam open. Make six units like this.

I cut twelve 3 ½” triangles from the background fabric and sewed one to each side along the top edge. This created a 6 ½” triangle unit. Make six full units like this.


Arrange those six units into a snowflake hexagon. Sew it together into two halves, pressing each seam open. Finally, sew one seam up the middle and press that seam open.

I decided to turn this block into a throw pillow, so I used the 6½” wedge triangle cuts from this blog to fill in the corners. I added a strip to the top and bottom edges to make it a full 14” square.
I caught a glimpse of it in the sun as I was walking through my studio, and WHOA!! What a cool block!

Too bad I couldn’t keep it that way and still make a pillow! I added the batting and backing and quilted it up. It lost a little of the magic, but it’s still cute.

And just like that… a wintery decor piece was born 🙂
Happy Sunday Everyone,
Krista
By the way! Fresh off the cutting table this week, we have two new kits. I made a blue version of the Fall Foliage and a Valentine version of Vintage Windmill.


