Flagship Scrap Quilt
- Krista Moser

- Aug 22, 2021
- 3 min read

More ideas for your scraps! Are you ready? I made a new version of my Semaphore Stripes pattern recently as my class sample for a couple of virtual classes. That pattern yields the most beautiful scraps and I couldn’t throw them out! Soooo, this week I had a chance to tinker with those scraps for a bit, and I thought I would share what I came up with.
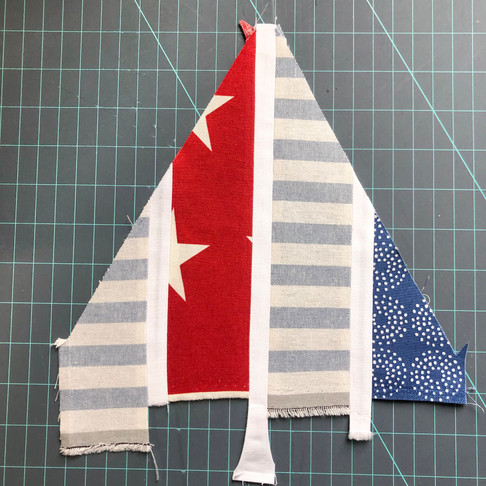
Because of the way the blocks are cut, you get these wedge/half triangle units that when sewn to each other can be cut into fun pieced triangles. I Inserted a narrow white strip between the two halves to mimic the strip that was already pieced into the scraps. You could make these same blocks with a random arrangement of strips of any size.
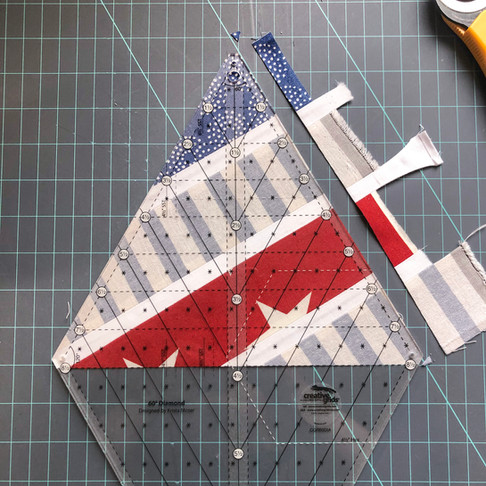
Once the two sides were pieced together, I laid the triangle side of the Large 60-Degree Diamond Ruler down with the dashed center lines going up the middle. I was aiming for an 8 ½” triangle, so I made sure to scoot the ruler close to the tip of the triangle to get the biggest triangle possible. Trim on both sides of the ruler.
Turn the fresh-cut piece aligning one edge with the 8 ½” triangle line to cut what was the bottom edge off clean.

I had enough scraps to make 27 blocks like this. And, now to cut the fill-in blocks for the edges.
From the leftover bits, I cut my side fill-in units in a similar manner as before, but this time the half units are lined up just over the center of the ruler to the left or right dashed centerline depending on what side you are filling in.

See how the half-units fill in the edges.

The final layout is complete!

Now, for the background. I cut four strips 8½” by width of fabric (or 42”). Keep the strips folded with the wrong sides together, and cut the selvages off so you have a clean edge. Align the 8 ½” triangle line along the bottom edge of the strip and the left dashed center line down the left cut edge. Cut along the right side of the ruler to get a mirror image set of wedge fill-in pieces.
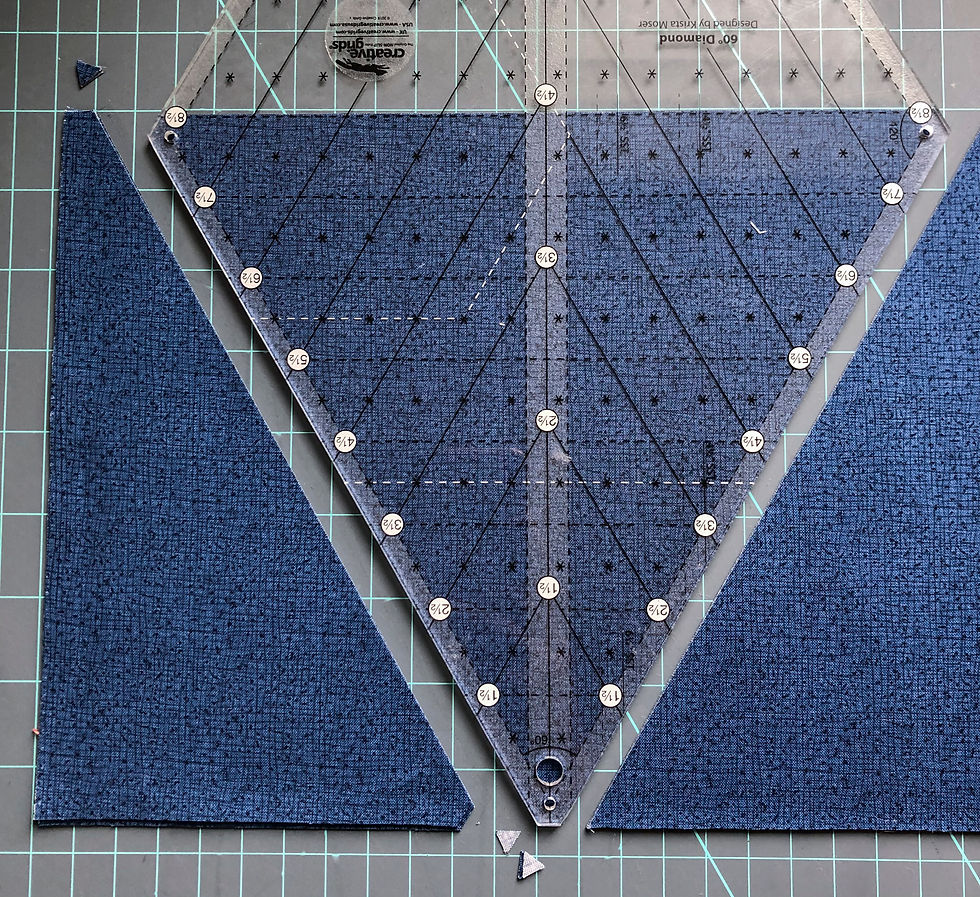
Rotate the ruler 180 degrees and cut full triangle units from the rest of the strip. Align the top edge of the strip, along the 8 ½” triangle line, then cut and rotate the ruler again for the next cut.

I was committed to using only fabric I had, so I used two different navy blue fabrics for my background.

Sew all the blocks together into horizontal rows. Press each seam open before adding the next block. This will help keep the intersections as flat and bulk-free as possible.

Sew the rows to each other and press those seams open. I added a little 1 ½” white border to secure the outside edge. Here it being quilted. I almost always do simple quilting on these quilts, this time I did straight lines in the pieces, triangles and swirls in the blue background.

Now for the binding… more scraps were used! If you cut the Semaphore Stripes quilt out just right, you'll get these great bias striped pieced sections that are left over.
I cut them into 2¼” wide strips and sewed them end to end to make enough binding.

Here it is wrapping the edge of the quilt. No scrap left behind!

Would you look at that?! Not one quilt, but two out of the same fabric and not a piece wasted :) I feel pretty good about this one! I’m calling it ‘Flagship’ because I think it looks like those little flags on a string. Haha!

I've had quite a few requests for more kits of my quilts so we are working to offer more all the time! If you would like a kit for this Semaphore Stripes quilt (that would get you this Flagship scrap quilt too), you can find that kit here (we have a limited number of them, but will work to get more if needed).
Happy Sunday everyone,
Krista
Follow all my quilty adventures on Instagram, Facebook, and Pinterest. Visit my Youtube channel for free tutorials and tips. If you like my patterns, you can buy them on Etsy, and here on the website.


