The Perfect Quarter Inch Seam
- Krista Moser

- Apr 6, 2019
- 3 min read
Updated: Jan 1, 2023

What to do when a ¼” seam actually matters (and that’s not always the case). If you’ve ever been frustrated over piecing accuracy, read on! Maybe this will clear up a few simple problems.
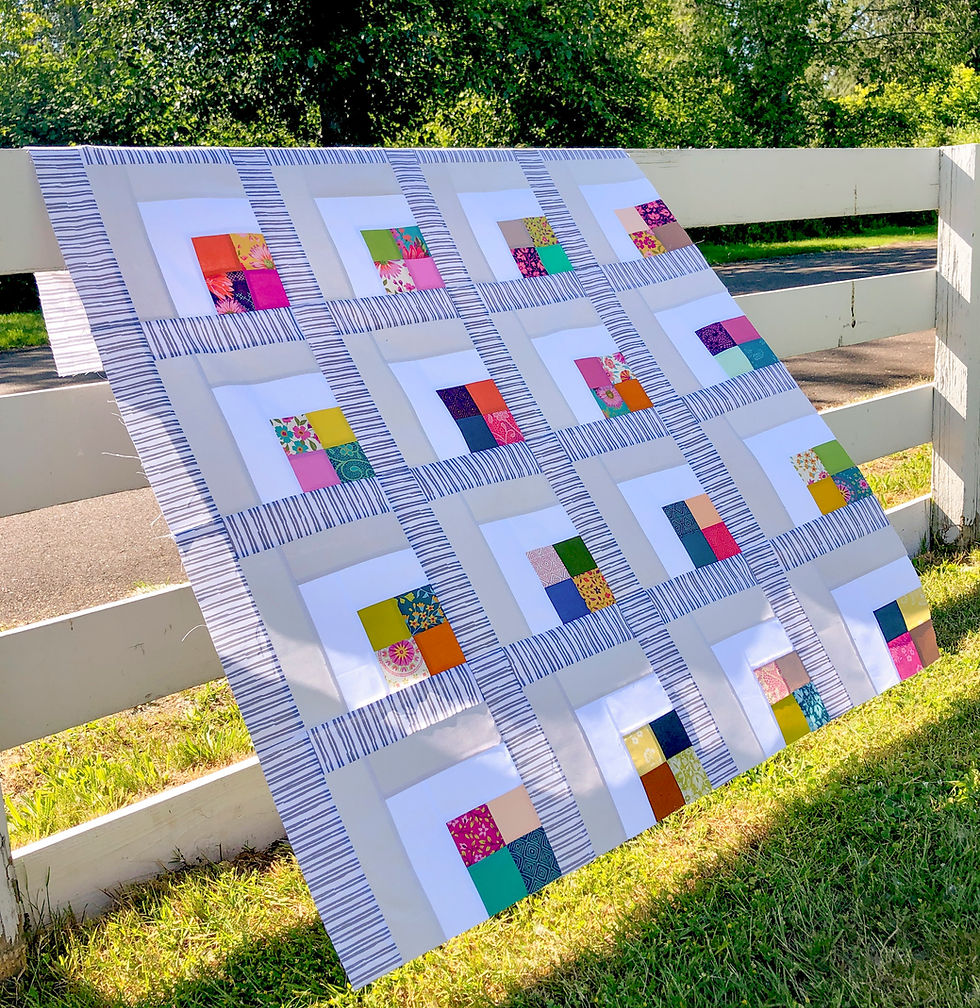
Piecing accuracy is super important when your quilt has several different pieced blocks together, like a block of the month, or when you are sewing a pieced block to a solid block as seen in this quilt. You don’t want your pieced blocks to come out smaller than the solid block. Of course, you could always just cut down the solid blocks, wink, wink… nobody would know, but mastering the ¼” seam really shouldn’t be brain surgery, so let’s see what we can do about it!

If you have a regular presser foot for your sewing machine, you will need to measure from the edge of the foot to where the needle goes into the fabric. I used one of my small quilting rulers placed under the pressure foot, lining up the edge of the foot with the edge of the ruler. I lowered the needle down to the ruler by hand turning the flywheel. From here, you will see how far off the ¼” line the needle hits. I had to move my needle two clicks to the right for the needle to hit squarely on the ¼” line. Make sure you write your new needle position down somewhere safe so you won’t have to figure it out again later!


CLICK ON PHOTOS TO ENLARGE
If your machine does not have an option to move the needle from side to side, this is how to proceed. Using the small quilting ruler again, place it under the pressure foot. Only this time, you will line up the needle with the ¼” line on the ruler; the edge of the ruler may or may not line up with the edge of the foot. Here, I used a red Sharpie to color the edge of the foot that landed outside the ruler's edge. This will give you a new guide to follow instead of the edge of the foot (the sharpie will wear off over time, but in a pinch, this works great!)


If you have a ¼” foot for your machine, then you’re in luck! But it may not be as accurate as you were led to believe. The best way to test for accuracy using any pressure foot and any needle placement is to sew a test strip. Take two 2½” strips and sew them together lengthwise. Press the strip set open from the front, using the nose of your iron to get the seam all the way open. This is very important! Now, measure the width of the strip set; it should be right at 4½” total. If it is over or under, then adjustments are needed. You can either move your needle or adjust the Sharpie line.


With this set of six strips, I intentionally did an ever so slight scant ¼” seam. The more seams you have, the more chance there is to lose something in the pressing. If you’re using a heavier thread and then pressing your seams out, that added bulk in the thread size sometimes make quite a difference over multiple seams.


Happy Sunday everyone, and Happy Quilting too!
Krista
Follow all my quilty adventures on Instagram, Facebook, and Pinterest. Visit my Youtube channel for free tutorials and tips. If you like my patterns, you can buy them on Etsy, and here on the website.