Quilt Math Made Easy
- Krista Moser

- Jan 28, 2024
- 3 min read

A couple of weeks ago, I started a little scrap quilt using 2½” squares and leftover binding ends that I couldn’t seem to throw out. I showed my process for partial seams in making those super simple but interesting blocks in that week's blog post, Partial to Scraps!

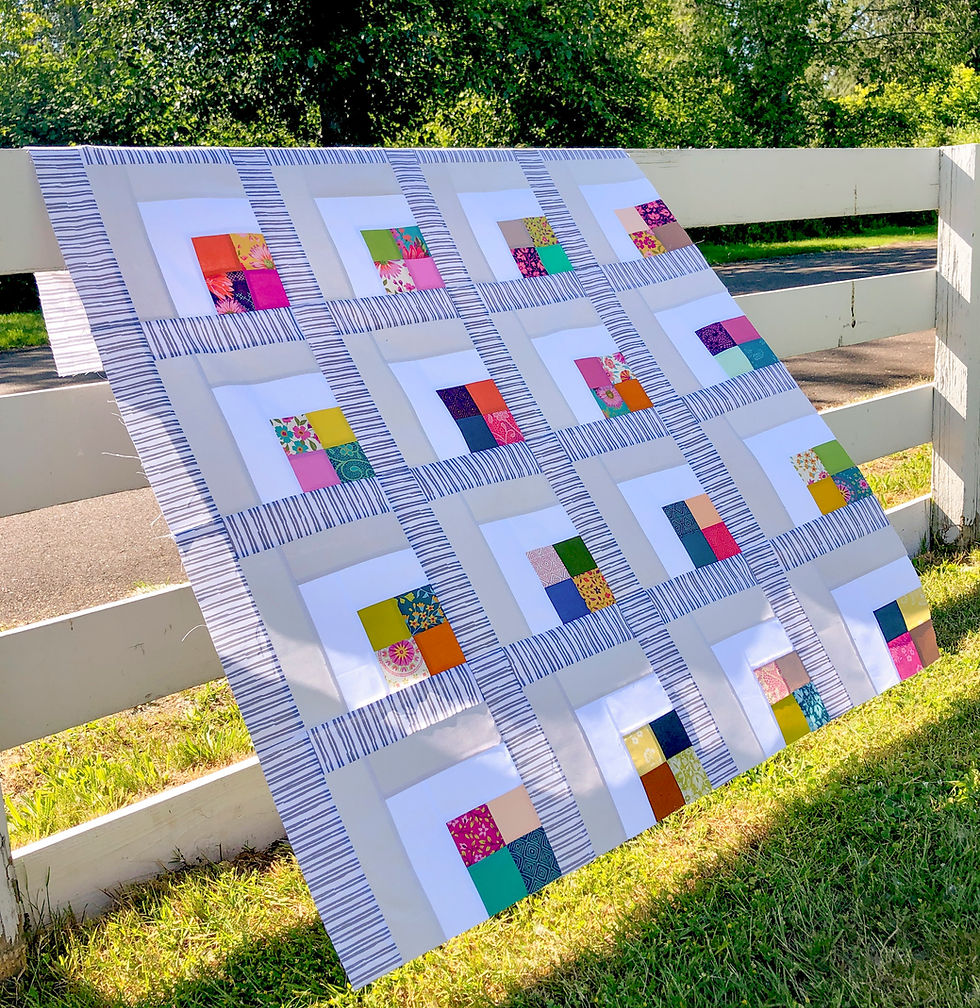
I made a total of sixteen blocks that ended up 6½” square. Now, to figure out a layout 🙂

I decided on four rows of four blocks to make a square quilt. I thought it would be more interesting to put the blocks on point.… and that meant I needed to do quilt Math for those fill-in triangles around the edge.


First, I cut nine 6½” squares of my background gray for the middle blocks. These blocks are the same size as the pieced blocks.

For the triangles along the sides, I wanted to cross cut larger squares, twice diagonally, to keep the outside edges along the straight of grain containing the bias-cut edges of those triangles to the inside of the quilt. Bias edges will stretch and it can be a bugger to get a quilt to lay flat once the stretching begins. I cut three 10½” squares, and cut those squares twice diagonally, as shown, to get twelve side-setting triangles.

Next were the corner triangle cuts. I needed to cut these squares, once diagonally, to keep the outside two edges along the straight of grain, and the cross cut (biased) edge would then be towards the quilt block. I cut two 5¾” squares, and cut those squares once diagonally to get 4 corner triangles.

Now for the layout! Fill in all those outside triangle spots and begin to form rows.

These rows get pieced together, diagonally, with the opposite corner units being the shortest and the middle row being the longest. When sewing the biased edge of those triangles to the straight of grain edge of the pieced blocks, keep your biased edge towards your feed dogs or BOB (bias on bottom). This will help control the stretch as you are piecing.

Once the rows are all sewn to each other, you can see there is just enough room at the outer edge of those setting triangles to “float” the blocks. I like this look and it makes it easy to bind without losing your points!
This little quilt ended up 36” x 36”...perfect for a baby quilt or a funky little wall hanging.
Quilt Math…
What if your pieced blocks were 8½” instead of 6½”? Here is the formula for figuring out those side-setting triangles no matter the size.
Multiply the finished block size by 1.41 (so that would be 11.98”). Add 1¼ inches to the dimension (13.23”) and round up to the nearest ⅛ of an inch (I sometimes round up to the nearest 1/4" just to be safe) . This would make your squares 13¼”. Cut those squares twice diagonally and you’ll have side-setting triangles.
For the corner triangles, here is the formula.
Multiply the finished block size by 1.41 (so that would be 11.98”). Divide that number by two (5.99”), add .875 inches, and round up to the nearest ⅛ of an inch. This would make your corner squares 7”. Cut those squares once diagonally and you’ll have corner triangles.

I put together this little printable chart for some common block sizes, so you can do Math at a glance :) But the formula above works for every size, if I didn't list the one you need.
Happy Sunday everyone,
Krista