Partial to Scraps!
- Krista Moser

- Jan 14, 2024
- 2 min read

How about another useful trick for using up scraps and making them look not so much like scraps after all?! This week, in my ongoing effort to sort out just how much fabric I have sitting around here, I uncovered a couple more packs of these little 2½” square crumbs.

First, I dug around some more and sorted out all my leftover striped binding chunks from past quilts. Can you tell, I don’t throw anything away ;) But, it comes in handy at some point!


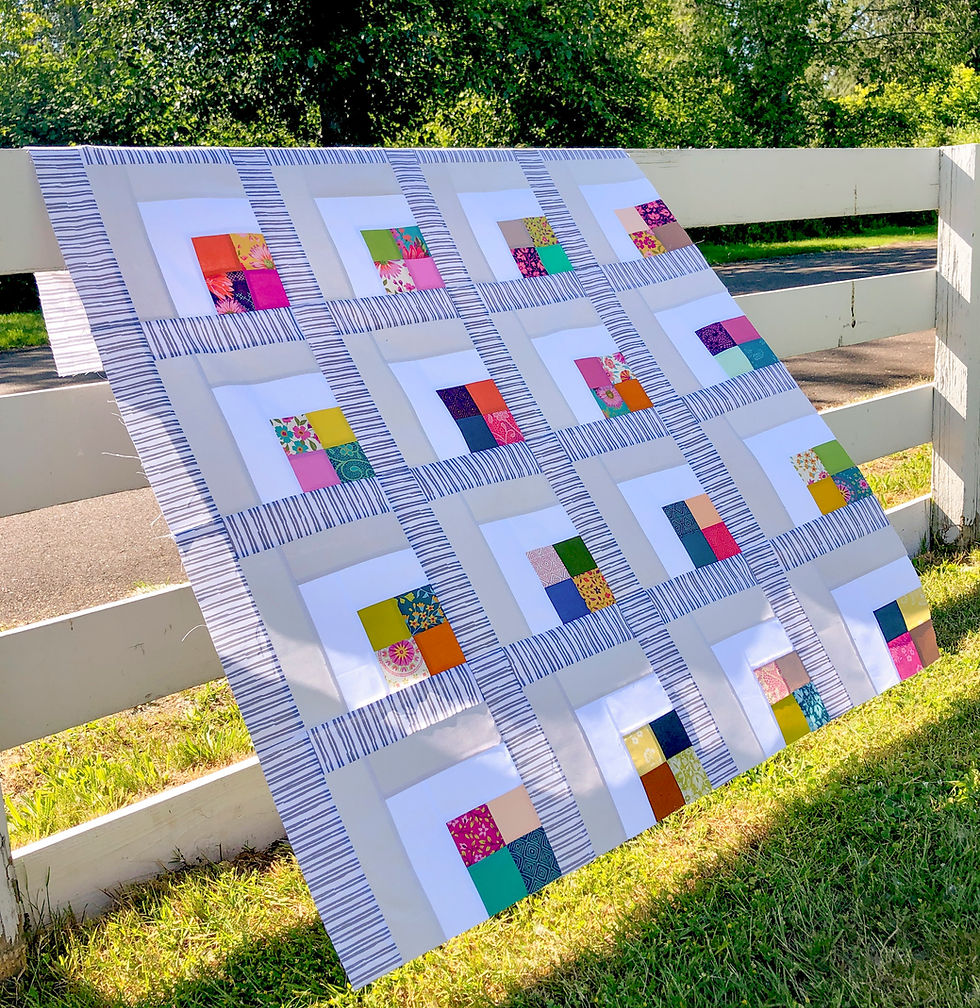
First, I made as many four patches as I could with these 2½” squares. I ended up with 16 four patches measuring 4½” square.

Next, I cut those orphaned binding chunks into 1½” x 5 ½” sections. I needed four for each block so I cut 64 total.

Now for the fun part! Have you ever done anything with partial seams? This is a super easy way to make a block look a little more interesting but not too complicated to piece together. You can see here how I have laid the 1½” x 5½” “rail” pieces along each edge overlapping the next rail piece in a rotation.

Start stitching on the first rail piece by lining up the end of the rail with the edge of the four patch. Stitch almost all the way down the length of the four patch, but leave about 1” unstitched where the rail piece is detached from the four patch.


Next, rail piece two is added. This one gets stitched down the whole length, end to end. I like to press these seams open because it makes for a very flat block, but you can press to the side if you like.


Now, piece three is added stitching end to end. Press that seam open.

Finally, it’s piece four’s turn. Before sewing piece four in place, you will want to pull piece one out of the way at the top edge. Sew piece four end to end and press that seam open.

To finish the block, you will lay piece one back in place over the end of piece four and finish the partial seam you started with.

And, just like that you have a cute scrappy block with a twist. I like to do this method because I can cut all those rail pieces the same size and then decide where they are going to go. Not a lot of pre-planning is needed for figuring out side rails and top/bottom rails.
Before I knew it, I had my pile of 16 scrappy blocks all made up. These squares ended up 6½”. I have a fun layout in mind for a baby quilt, and I’ll share that next time! I’m off to teach at Road to California this week, so when I get back we’ll pick it up here with setting squares and side-setting triangle math :) I bet you can’t wait, haha!!
Happy Sunday everyone,
Krista