

Pin Basting Your Quilt
- Krista Moser
- Aug 30, 2020
- 2 min read

So you've decided to do the machine quilting on your next quilt, that’s great! Now, let’s make sure you have the most success with the least issues :) Pin basting your quilt layers together properly will ensure no puckering or tucks during the quilting process.

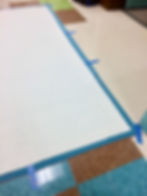
Stretch your quilt backing out, pretty side down, on a smooth flat surface (we are using a linoleum floor here). I always press any seam in the backing open to make them lie as flat as possible. Tug gently on each corner, and tape them down as you go, then tug and tape the edges between corners in a few places. You want the backing to be taut and smooth but not pulled too tight.
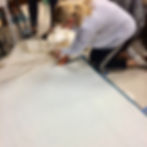
If you choose to use a quilt basting spray, now would be the time to whip it out! On bigger quilts, I use a light dusting of basting spray before pin basting. Peel back the batting you just cut, and spray the backside. Smooth it out with your hands working from the middle out.

If you choose to use a quilt basting spray, now would be the time to whip it out! On bigger quilts, I use a light dusting of basting spray before pin basting. Peel back the batting you just cut, and spray the back side. Smooth it out with your hands working from the middle out.


Then, spray the top side of the batting, and smooth the quilt out over the batting.


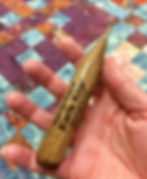
Now for the pins! I like to use the Coil Less curved safety pins. They have a “belly” so they scoop through the layers and right back out. The Coil Less version is nice because it doesn’t snag or get caught in the quilt top.

Pin in a grid-like pattern, about every 4”. This will ensure even placement and less room for the layers to shift.

Peel your quilt off the floor, and you’re ready to quilt!
Happy Sunday everyone,
Krista
Follow all my quilty adventures on Instagram, Facebook, and Pinterest. Visit my Youtube channel for free tutorials and tips. If you like my patterns, you can buy them on Etsy, and here on the website.