

Glue Basting
- Krista Moser
- Aug 9, 2020
- 2 min read
Wow guys, I am impressed with how useful this technique is! I have been wanting to try glue basting for a while now, and I finally got the chance.


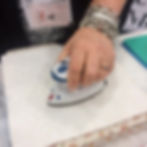
One of the vendors at Quilt Market was demoing Roxanne Glue-Baste-It. She dotted the glue around a heart shaped piece of fabric, then turned it over onto the background piece and ironed it in place, essentially drying the glue immediately so she could stitch around it without trouble.
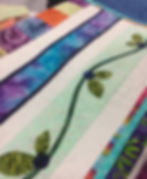
They had several examples of other ways you can glue your fabric into submission….! Here you see little leaves and bias strips that were glue basted down before stitching. The nice thing is once the glued piece has been ironed/dried, it can be peeled off and put somewhere else if you misplaced it. Or, you can stitch through it without any gummy residue.
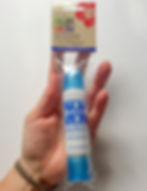
I bought one and brought it home. I just used it for the first time and whoa, is it handy!


It has a two way applicator, one side is narrow and puts out little dots, the other side is wider with a brush-like end to cover larger areas.
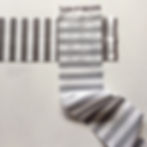
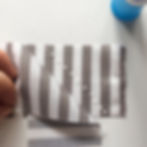
I used it to match up the stripes on some binding strips I was sewing.


I put a dot line diagonally where I planned to sew, then I lined up my stripes and pressed the pieces into place.
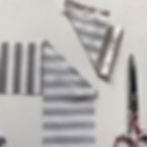
After sewing, I clipped the excess off, effectively removing most of the dried glue with it.
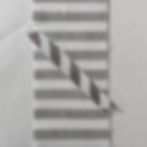
Then, I pressed the seam open. Look at that perfect match! First try too :)

You could use this to match up plaids, or secure biased edges so they don’t stretch…. Oh the possibilities!
Well, there you have it, a quick blog to show you my new favorite trick.
Happy Sunday everyone!
Krista
Follow all my quilty adventures on Instagram, Facebook, and Pinterest. Visit my Youtube channel for free tutorials and tips. If you like my patterns, you can buy them on Etsy, and here on the website.