A Pressing Matter
- Krista Moser

- Apr 20, 2019
- 3 min read
Updated: Apr 22, 2019

There is a lot of chatter out there about pressing these days. Over the years, fabric has gotten higher in quality and thicker as a result. This has made for some very hefty seams that can be bulky, won’t lay flat and are hard to work with…. So what’s the fix? Well, I’m glad you asked ;)


Here is an adorable llama quilt that has quite a bit of piecing in the face. Some of these pieces are the size of a postage stamp! The fabric used is a heavier linen/cotton blend that makes for great texture, but it also makes some of the thickest piecing you’ve ever seen. The maker (Michelle) wisely pressed all the seams open around each piece. This allows each of the pieces to lay flat instead of the seam rolling to one side or the other.

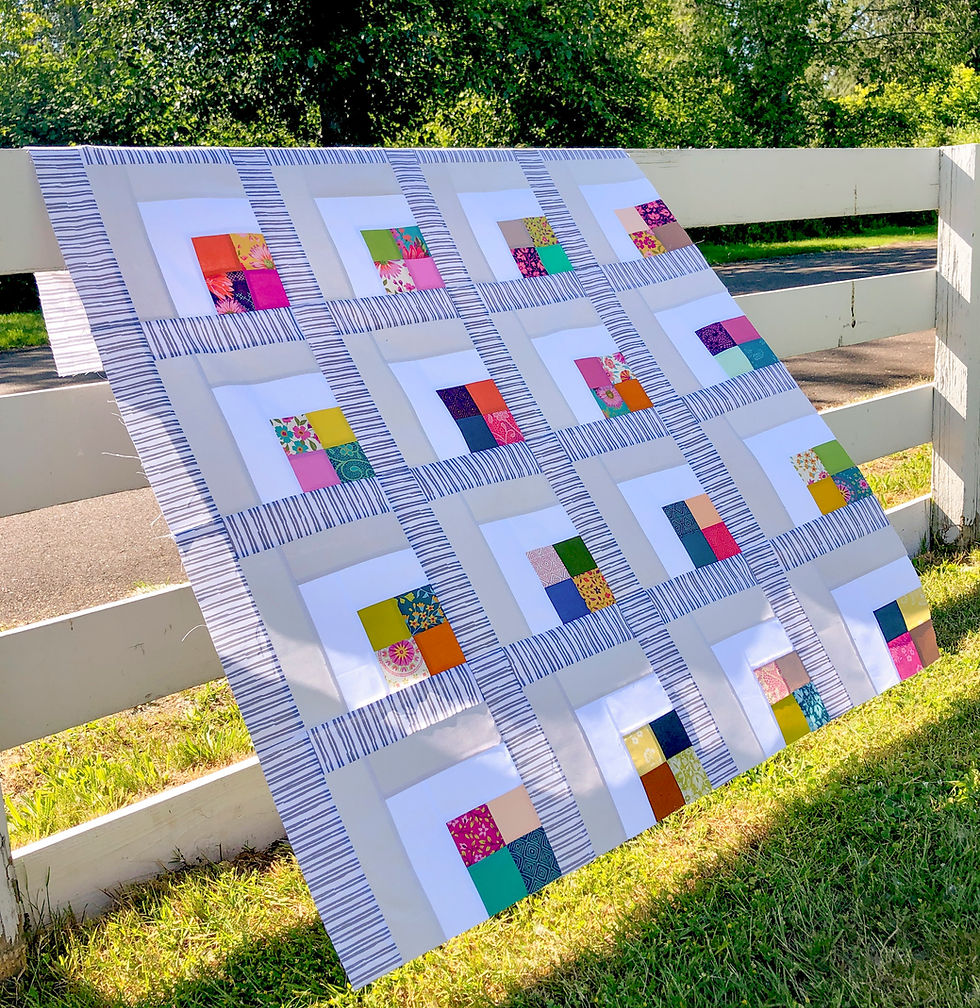
Here we have it all! The strips sewn together to make the blocks are all pressed one direction. The blocks are then sewn together and those seams are pressed opposite each other so they “nest” when the rows are sewn. Then the long seam that attaches the rows together is pressed open to disperse the bulk evenly to either side. This makes for a very clean outcome! The best of all worlds. Nice work Elaina :)

Now, here is a trick I used recently when piecing diamonds together.


I had pieced a skinny gold strip down the center and pressed the seams towards the outside. This created a channel down the middle with ridges on either side. The gold strip is only ½” so sloppy pressing could make a visual difference in the final outcome.

I sewed triangles to either side of the diamond turning it into a larger triangle unit. You can see I pressed the right seam away from the diamond and the left seam towards it (this will be important later).


I made six of these diamond point/triangle units in different colors, each one with the right seam pressed away and the left seam pressed towards. Now laying them side by side, the right seam will nest with the left seam of the next block.


Pin the units together all way to the points. Right at the tip, I rolled the one seam to the other side so the gold strips would nest together. Pin in place and stitch.


Clip the seam, just up to the stitching, so the rest of the seam will roll back the way it was. The gold strip nests beautifully at the tip.


Press this seam open. You can see how nice and flat that makes the front look.


I repeated this process to join all the diamond star points together. Just look at how flat that made things! All those seams coming together and there is very little bulk :)
Do you have pressing issues? I'm happy to help. Leave your questions and comments below.
Happy Sunday everyone!
Krista
Follow all my quilty adventures on Instagram, Facebook, and Pinterest. Visit my website for free tutorials and tips. If you like my patterns, you can buy them on Etsy, and here on the website.
PS: I'd love you to leave a comment. Unfortunately, the new hosting software requires a login which is out of our control for the time being. (They are working on a comments section we hope will function more like the old one). For now, if you want to leave a comment, but don't want to login, you can always send an email to me at info@kristamoser.com. I'll get back to you as soon as I can.