

Solo Star ;)
- Krista Moser

- Apr 19
- 3 min read
It’s not a Lone Star block, because it has six points instead of eight, but it is a Solo star!

I was tinkering with a block idea this week. One that would use up more scraps and could be made with leftover 2½” strips. I love the way it came out! This block could be sized up or down depending on how big you want to make it.
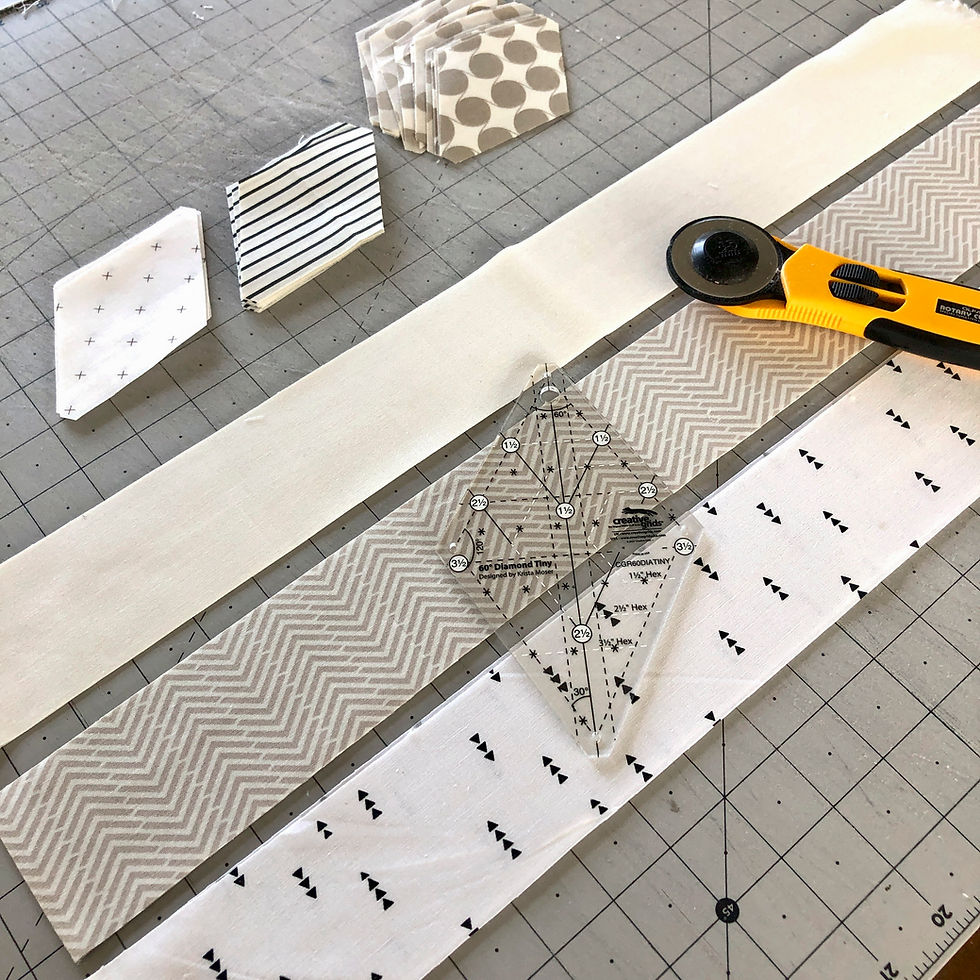
I cut a bunch of 2½” diamonds from leftover neutral strips. I save everything! I have a lot of favorite little stripes and graphic prints that I use to the very last scrap.


I laid out two different sets of nine diamonds. These will make my star points. They are very similar to each other, except for the three-dot print diamonds across the middle and the bottom point. The whole star needs six points like this, so I made three in each arrangement.

This is how they are assembled. You will sew the diamonds into little rows of three diamonds each. Press the seams open. It's very helpful to press all seams open on these blocks, because you get a better match when joining the little rows together.


To join the rows to each other, fold the middle row down over the first row. See how the seams now go in opposite directions, creating an X when they cross each other towards the outer edge.

You’ll want to use a fabric marking pen or pencil to make a mark ¼” from the outer edge. This is precisely where the seams need to cross each other.


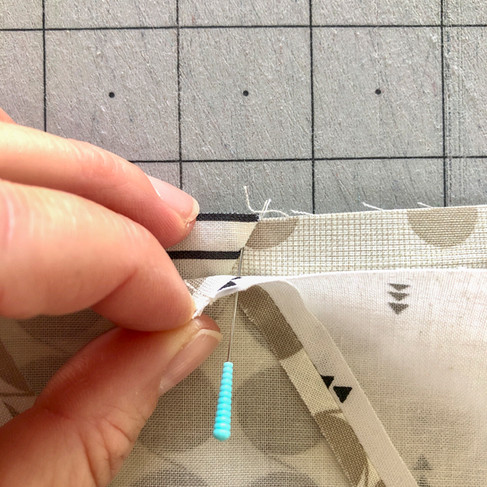
Poke a straight pin through the mark on the upper piece and into the seam on the lower piece ¼” from the edge. Sew the seam with a ¼” seam allowance and press it open. Repeat this process with the next row of three diamonds.
Here you see all six star points laid out on the design wall. I alternated the center points for added interest.


For the background, cut six 6½” x 4⅝” rectangles and place them in pairs right sides together. Use the large diamond ruler to cut these in half diagonally. Align the 6½” triangle line along the bottom edge, and the left dashed center line along the left edge.
Cut on the right side of the ruler to make two mirror-image wedge triangle sets. Repeat this with the other two pairs of rectangles for a total of twelve wedge triangles.
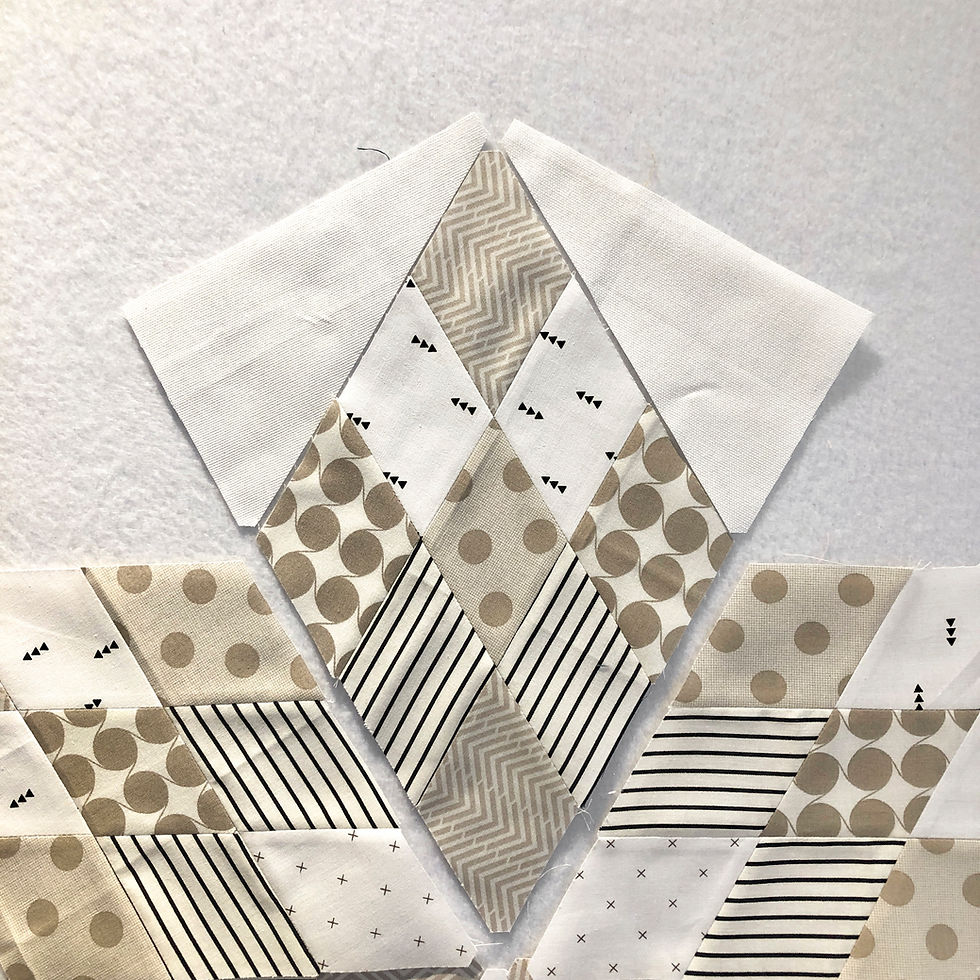
Each one of the star points gets one wedge triangle on each side. Sew these in place and press those seams open.

Here, all six star points have their background wedges sewn on. Sew these together into two halves with three wedges on top and three on the bottom. Press all seams open.

Finally, sew one seam across the middle to join both sides. Press that seam open. And the block is done! Isn’t she a beauty?! This block measures 24½” from point to point and 21½” from flat side to flat side. I can’t wait to make more of these blocks with all my scraps!
Happy Sunday, everyone,
Krista
Follow all my quilty adventures on Instagram, Facebook, and Pinterest. Visit my YouTube channel for free tutorials and tips. If you like my patterns, you can buy them on Etsy and here on the website.


