

Don't Throw That Out!
- Krista Moser

- Jan 31, 2021
- 2 min read

You guys know I’m a sucker for pretty scraps, and last week’s Heart Candy quilt produced the prettiest pile of clippings. If you watched the YouTube video from last week, you’ll remember I said to keep those scraps! Well, I sewed them all together and made this sweet crumb quilt pillow :)

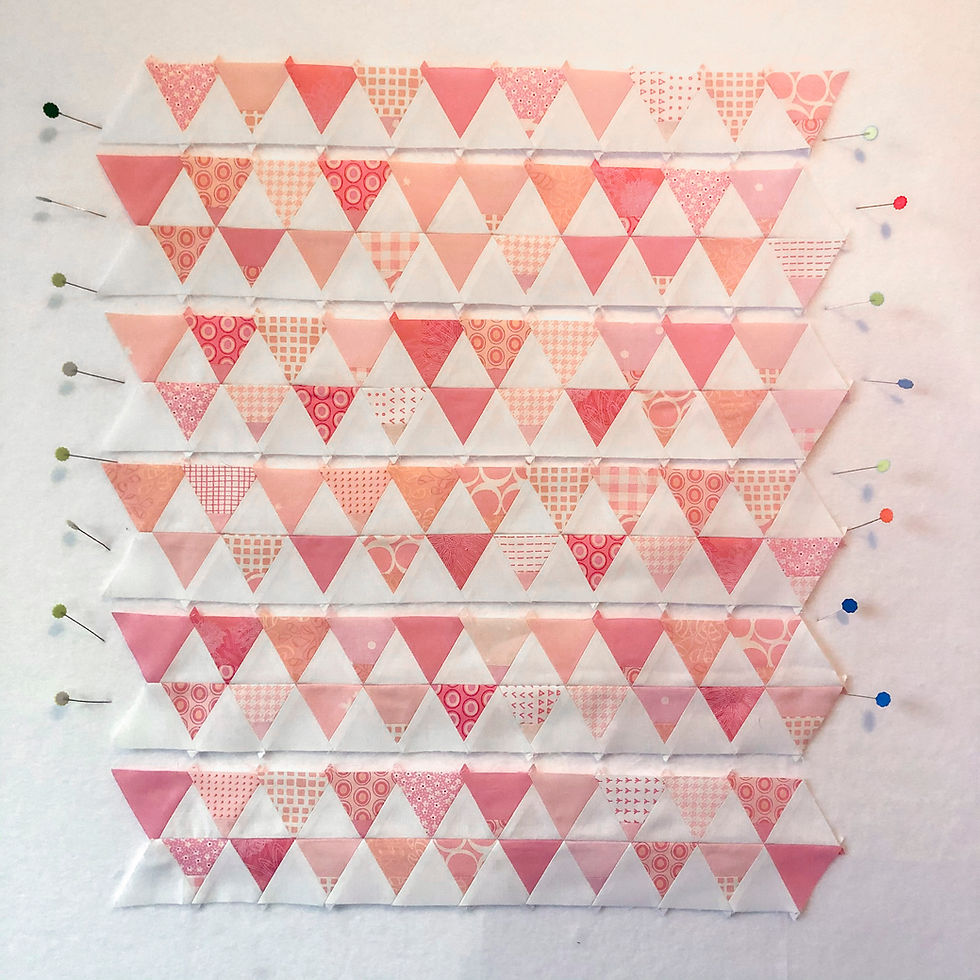
You can make this by using your own scraps from the heart block cuts, or by cutting a bunch of scrappy 2” triangles from whatever you have laying around. I made a 16” square pillow and that took (220) 2” triangles...you read that right! 110 pink triangles and 110 white triangles. You can see the bottom row here and how much it shrunk up once the pieces were sewn together, crazy!


For my background, I cut triangles from 2” white strips and laid them out alternating the pink triangles. Notice how I placed the pink triangles with their flat tips down and the white with their flat tips up. This will help keep the bias edges facing each other and cut down on the complications of bias stretch frustration.


I sewed each row together in sets of two (a pink and a white triangle) Press the seams between each triangle set open. Sew them into sets of four and then into full rows. Each row has (10) white triangles and (10) pink triangles. Press all seams open.

Progress was slower than I thought, but it was coming out so cute I had to see it done!

Once all the rows were sewn and pressed, I sewed the rows to each other, two rows at a time, pressing the long seams open. Then, into sets of four and so on.
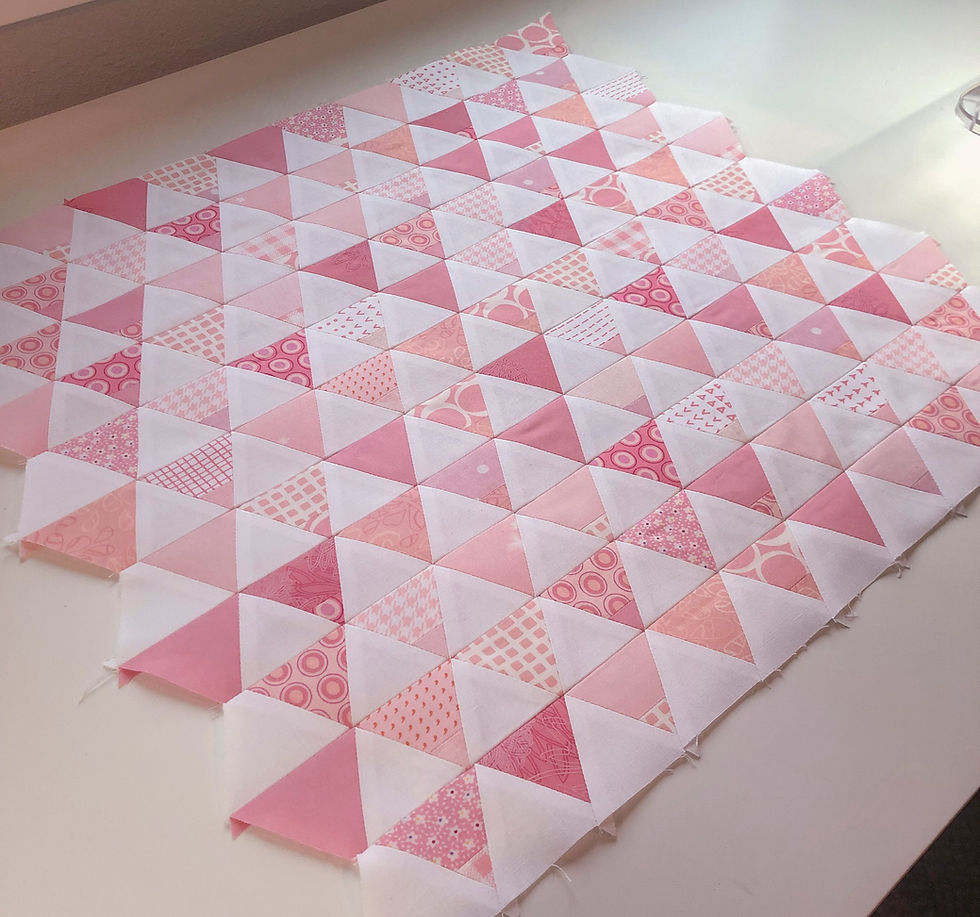

Once the whole pillow top was pieced, I gave it a good press with spray starch to keep all the seams flat.
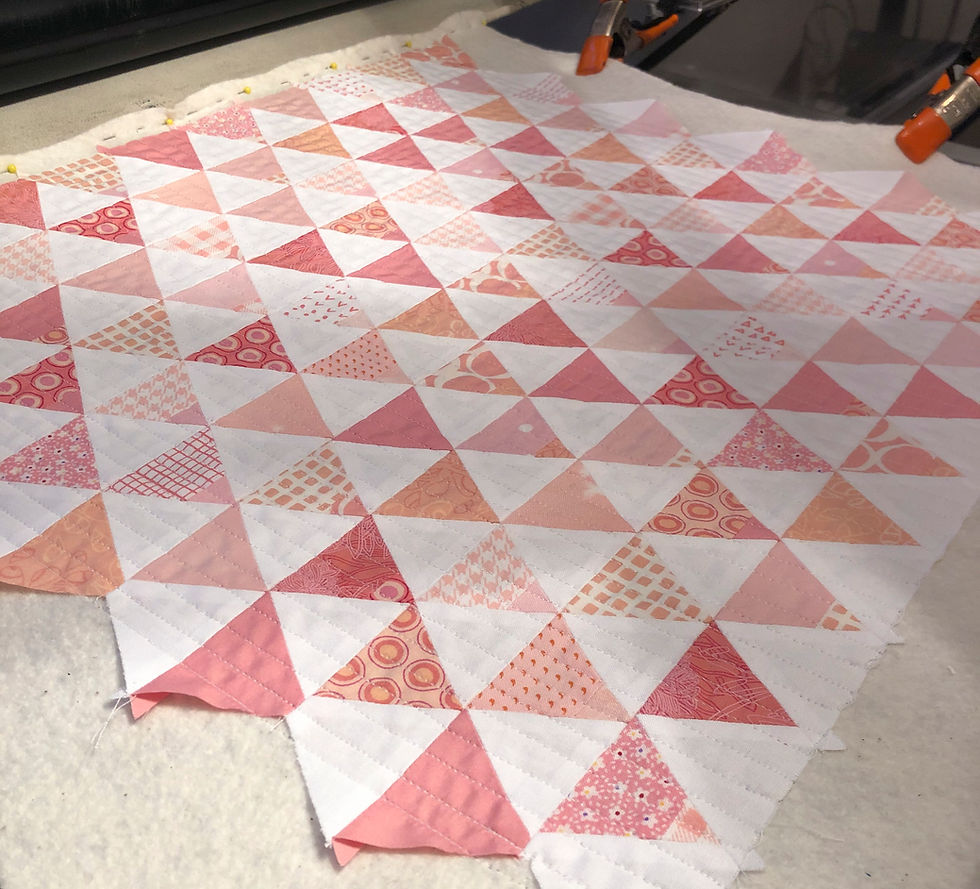
I quilted the top onto a piece of batting with straight line quilting. I also quilted the pillow back in the same way.
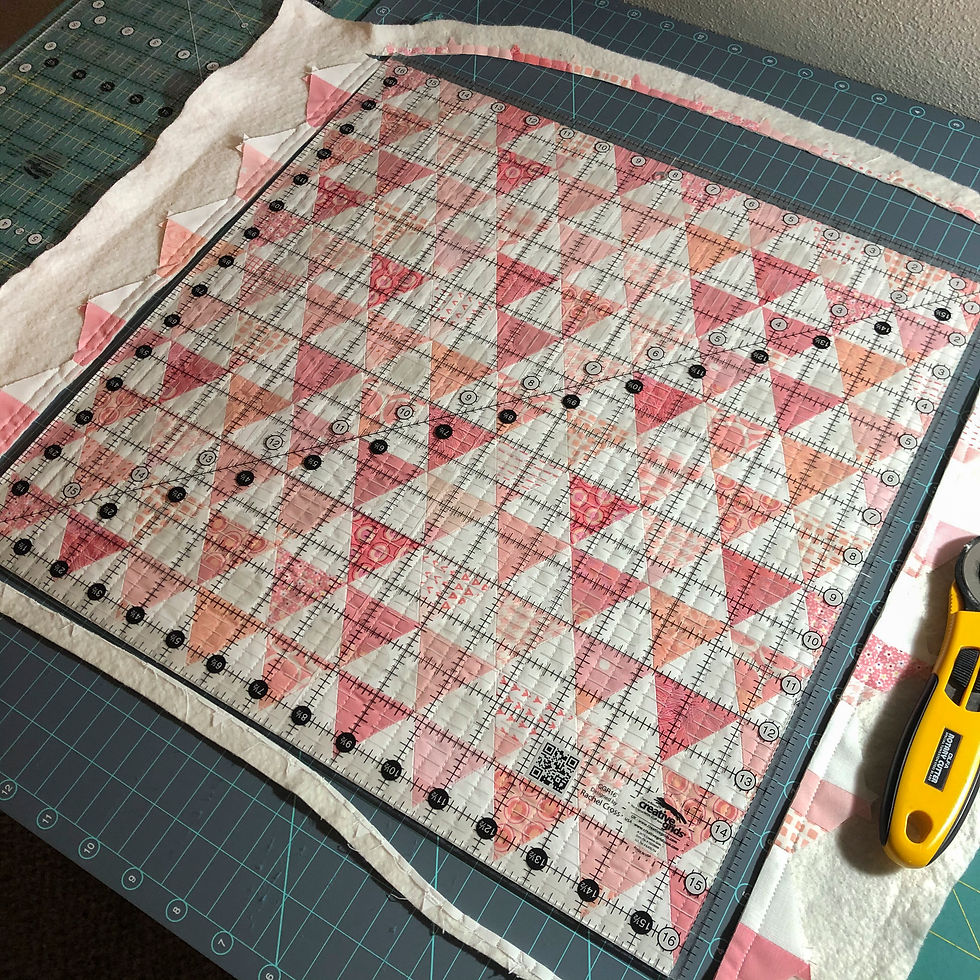

Take a large square ruler, or use the lines on your mat, to trim the whole thing down to 16¼” (repeat with the backing panel).
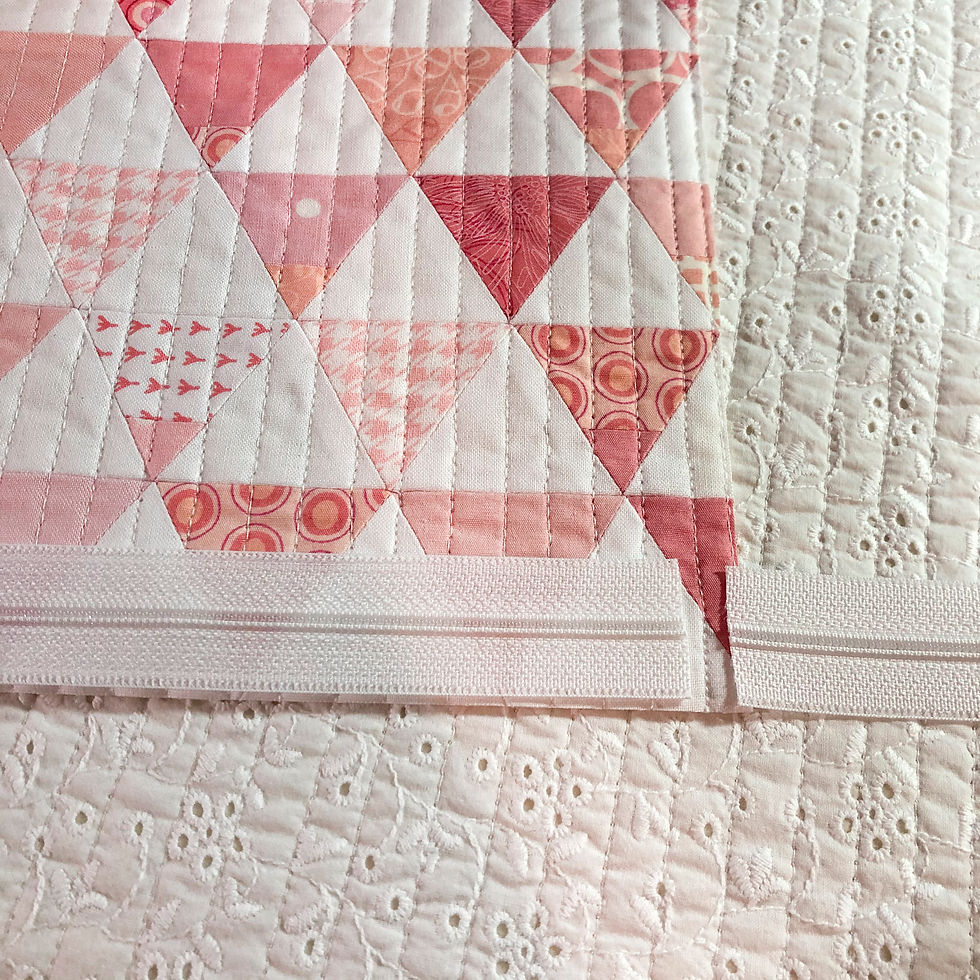
I usually put a zipper opening in my pillows, and here are my simple tricks for doing that! I cut the zipper about 1” shorter than the pillow, so in this case that is 15¼”. I center the amount to make it about ½” shorter than the pillow on each end.


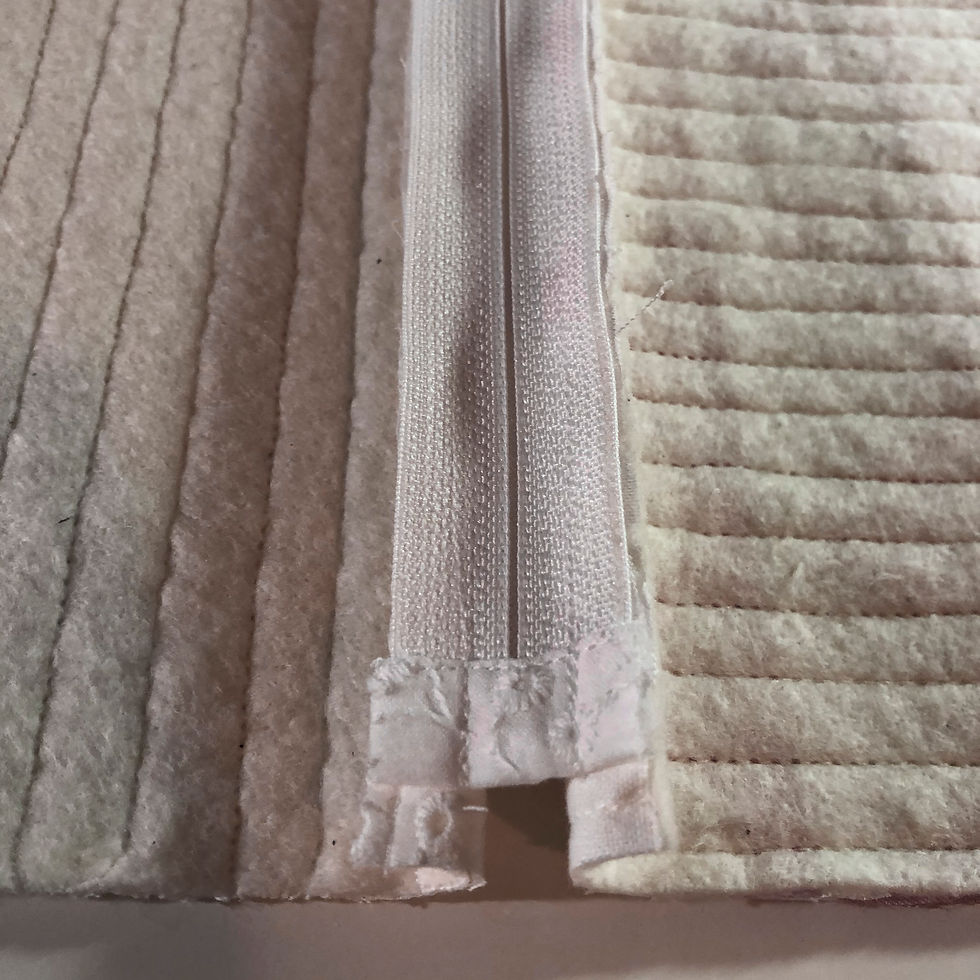
I make a little double fold tape-like wrap for the ends of the zipper. This will wrap around each end and be stitched down to act as a zipper stop at either end.

I center the zipper and pin in place, then stitch it along the edge to both the front and back panel.


Once the zipper is in place, I sew the front to the back on the other three sides with a heavy ¼” seam and turn the pillow right side out. Notice how the corners with the zipper have the bound off ends.
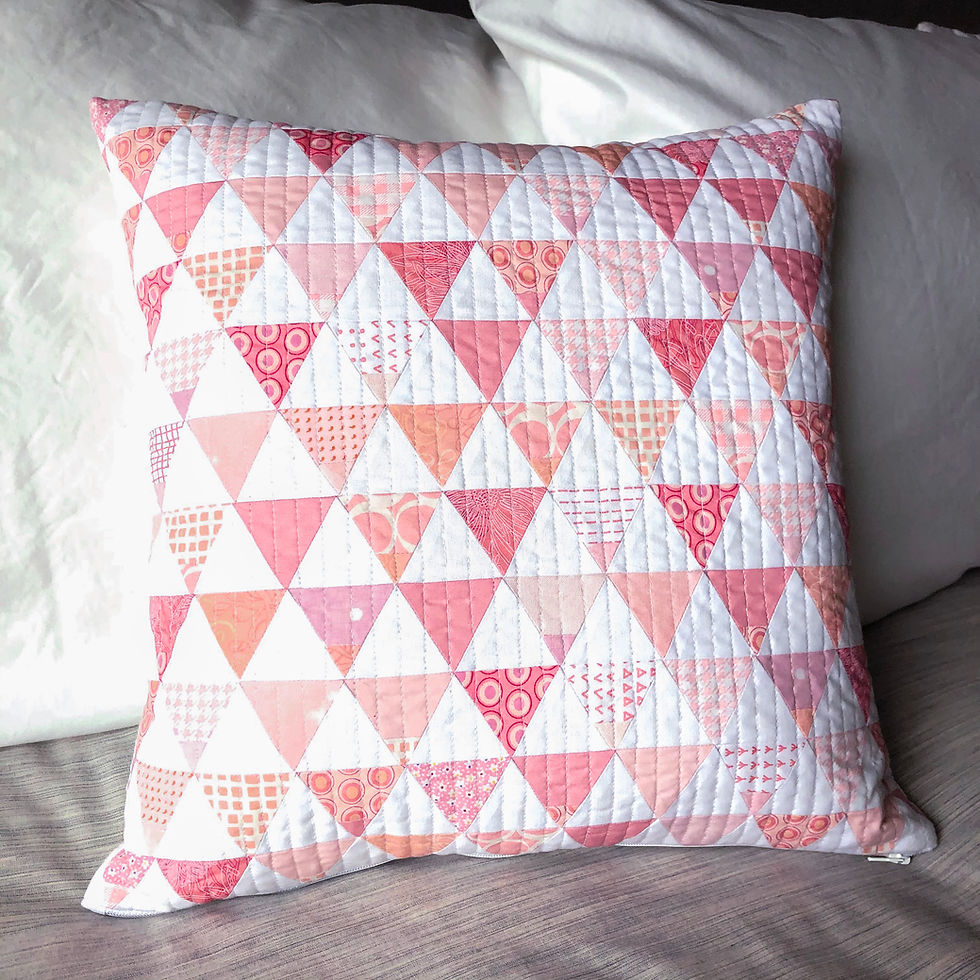


Stuff with a 16” pillow form and you're done!
Happy Sunday everyone,
Krista
Follow all my quilty adventures on Instagram, Facebook, and Pinterest. Visit my Youtube channelfor free tutorials and tips. If you like my patterns, you can buy them on Etsy, and here on the website.


