

Hip to be Square!
- Krista Moser
- Apr 5
- 3 min read
Do you have trouble squaring up your quilt blocks? Recently, I received a request for a tutorial on squaring up quilt blocks, and I thought I'd share my method. This is one of those things you hope to avoid, but it's helpful to know how when you need it!

Squaring up quilt blocks is important when they're not coming out the right size (typically bigger than they should be). It's also important if the blocks are not coming out straight. The corners on a square or rectangular block should be a 90-degree angle.

This little patchwork block is supposed to be 10½” square, but it actually came out closer to 10⅝” square. I needed to trim off 1/16" from each side for a total of ⅛” adjustment.

As you see here, the edges are also a little uneven, so trimming each side will take care of that.


First, I laid the block on my cutting mat and lined up the edges with the grid lines of the mat. Then, I laid my large square ruler over the block, with the 1” corner in the upper-right corner of my block. I trimmed the top and right edges by 1/16".

Most large square rulers have a diagonal line across them, corner to corner (it's usually marked as the 45-degree angle). You can use this line to align with the opposite corner on square blocks to help determine that they are indeed square and not cattywampus. If they aren't square, you can sometimes pull at opposite corners to pull them back straight, then press them with a little starch to set.


Once the first two edges are trimmed, turn the block around so the fresh cut edges align with the 10½” lines in the bottom left corner. Trim along the top and right edges again, removing the other 1/16" from each side. Now you have a perfect 10½” squared-up block.

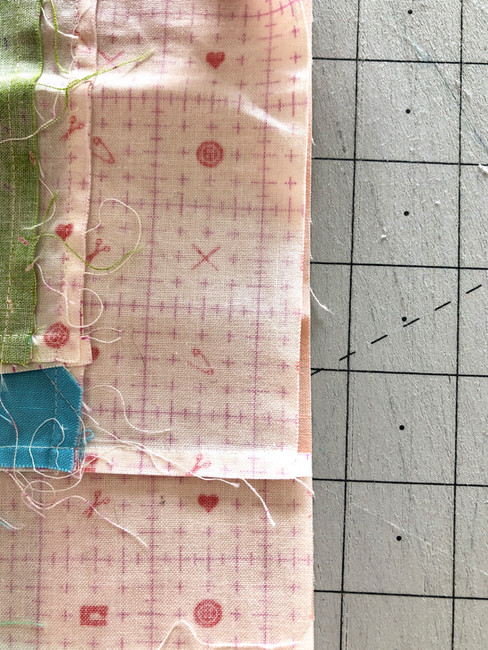
How about another situation? This time, it’s trimming off the sashing tails before adding a border.


Each horizontal sashing sticks out past the quilt, ready to be trimmed even with the quilt. Using a long straight ruler, align the edges on either side of the sashing tail. You may even be removing a small amount of fabric on either side, depending on how uneven it is.


Here is a situation where the edges on either side are actually quite different from each other. In this case, I lined up the long ruler as far out as I could on either side and “floated” the gap where the edge didn’t come out quite far enough. This will allow the border to be straighter visually once it is sewn in place.


This shows how it will appear when the border is ready to be sewn in place. There will be a small gap in the sashing fabric that will be eaten up in the seam allowance. I don’t typically risk a gap for more than a ⅛” difference, and you might shrink your stitch length to 1.8 to ensure everything is secure when sewing through this area.

Okay, last but not least. What if you have a block that is too big for your square ruler? In this case, you’ll need to use the lines on your cutting mat.

I made a large 19” scrappy log cabin style block that will be a throw pillow. I needed to trim it down to 18½” square. Two of the sides ended in narrower strips, and the other two sides ended in wider strips. I decided to cut the excess off the wider strip sides to balance the visual look of the pillow top. I lined up the right narrow strip side on the 1” line of my cutting mat.


I smoothed the block out, and it looked like I needed to trim off about ¼” from the left side of the block. I used the 19½” line as my guide and trimmed the left side.

I turned the block to cut the other wide striped edge down to make this a square. You’ll want to align both the right and bottom edges with the lines on your mat. Since we don’t have a diagonal line to follow, this will help determine if the block is actually square.

Again, I used the 19½” line along the left edge and the 1” line along the right edge. This time, I had to remove closer to ½” to make it square. But with all the edges lined up with the grid lines on the mat, I was confident this block would come out square in the end.
If you have trouble with this, I really hope there was something helpful here!
Happy Easter, everyone!
Krista
Follow all my quilty adventures on Instagram, Facebook, and Pinterest. Visit my YouTube channel for free tutorials and tips. If you like my patterns, you can buy them on Etsy and here on the website.