Don't Throw That Out!
- Krista Moser

- Jun 25, 2023
- 4 min read
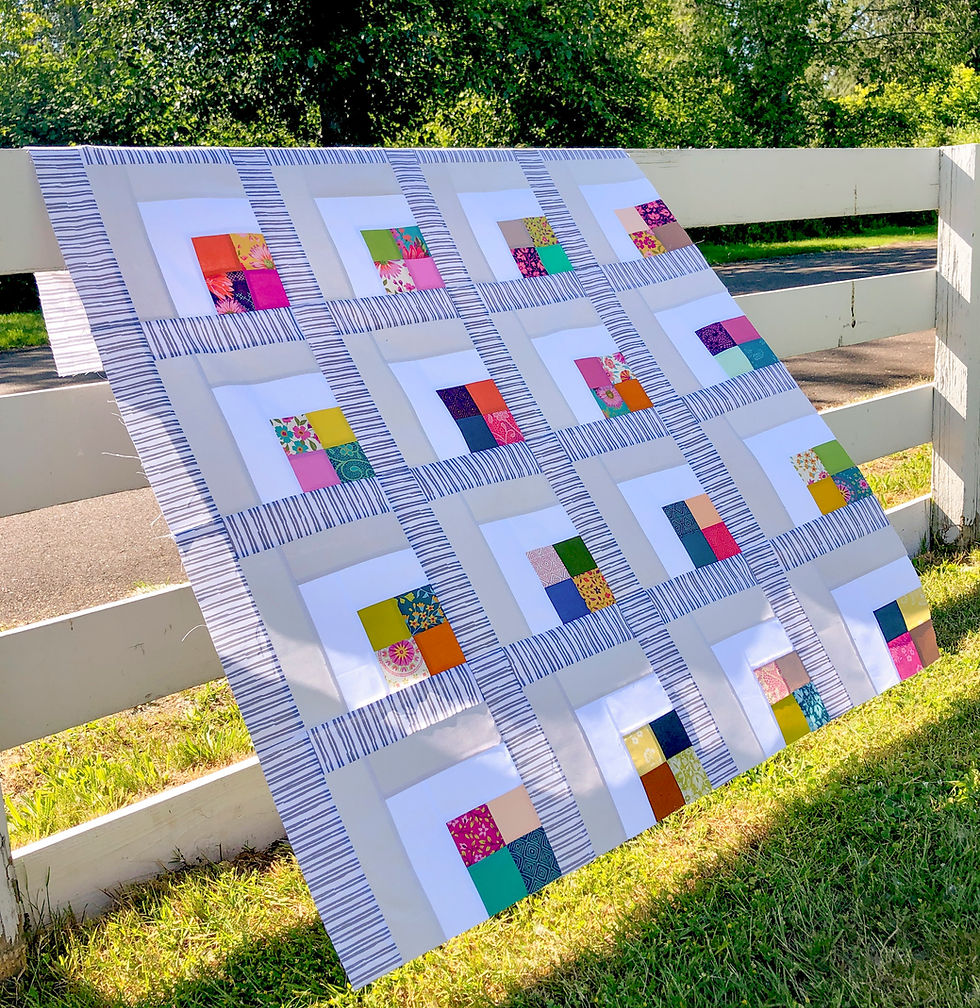
This week, I revisited an old project from a couple of years ago. I'd made this cute crumb triangle pillow cover with the leftover off-cuts from my Heart Candy Quilt, and guess what else has those same size off-cuts? My New Flutterby Frolic pattern!

This time, I used (288) 2” triangles to make an 18” square pillow. And, I hand-pieced the entire thing! I've never done hand piecing before, and I have to say it was kind of fun :)


It all started as my brainy idea to keep my hands busy on a road trip last week. We went to Banff, Canada, and I knew there were going to be some long driving times throughout the week. I didn’t have much time to prepare what I needed, so I grabbed my stack of triangle off-cuts and a couple of extra strips in case I needed more triangles. I also packed a soft blue/green as my background and the world's smallest rotary mat, and we hit the road!

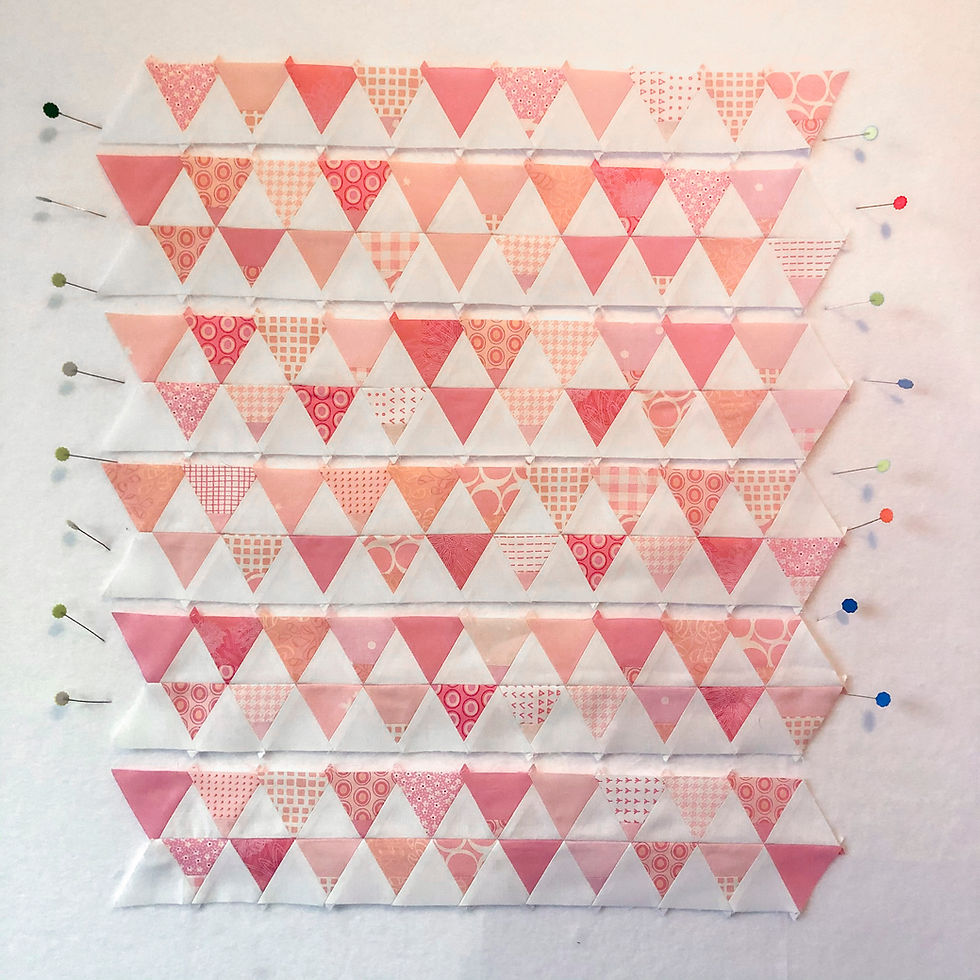
The first hotel night provided the opportunity to lay out all my pieces and figure out the size. This ended up as 12 rows of 24 triangles in each row. I packed a piece of batting so I could roll it all up and stay organized as I built rows.

Row by row the triangles came together and with a little help from the hotel iron they looked pretty good. As I said, I've never hand-pieced anything from start to finish before, so this was quite an adventure.


I pieced triangles in the car, and while we waited for our lunch order. I even found a willing and inquisitive student in Frosty the Snowman ;)

I’ve got some things to learn about hand piecing, including, how to keep the thread from tangling. I spent part of a gondola ride, down one mountain, trying to pick out a very tiny mess in my thread. I know there is a thread treatment product for just this sort of thing, but I had nothing on hand.

On one of our last days, we stopped at the cutest little fabric store in Nelson, BC called Stitch Lab. I thought it would be fun to find my pillow backing there to complete the whole project; a nice memento to this well-traveled project.

The final night on the road and all the rows are complete and joined to each other. I took advantage of another hotel iron to give everything a quick press before the last leg of the journey and hopefully the last of the rows coming together.


Once home, I gave this well-loved traveling companion a proper pressing with a little starch, and just look at how nice it came out! Now, I'll make it into the pillow cover it was intended to be.

Below, you can see my original pillow from a couple of years ago with full instructions on how to make your own. I did that one by machine, and that was much faster. But I have to say, this one has been more rewarding.

You guys know I’m a sucker for pretty scraps, and the Heart Candy quilt produced the prettiest pile of clippings. If you watched the YouTube video, you’ll remember I said to keep those scraps! Well, I sewed them all together and made this sweet crumb quilt pillow :)

You can make this by using your scraps from the heart block cuts, or by cutting a bunch of scrappy 2” triangles from whatever you have laying around. I made a 16” square pillow and that took (220) 2” triangles...you read that right! 110 pink triangles and 110 white triangles. You can see the bottom row here and how much it shrunk up once the pieces were sewn together, crazy!


For my background, I cut triangles from 2” white strips and laid them out alternating the pink triangles. Notice how I placed the pink triangles with their flat tips down and the white with their flat tips up. This will help keep the bias edges facing each other and cut down on the complications of bias stretch frustration.


I sewed each row together in sets of two (a pink and a white triangle) Press the seams between each triangle set open. Sew them into sets of four and then into full rows. Each row has (10) white triangles and (10) pink triangles. Press all seams open.

Progress was slower than I thought, but it was coming out so cute I had to see it done!

Once all the rows were sewn and pressed, I sewed the rows to each other, two rows at a time, pressing the long seams open. Then, into sets of four and so on.
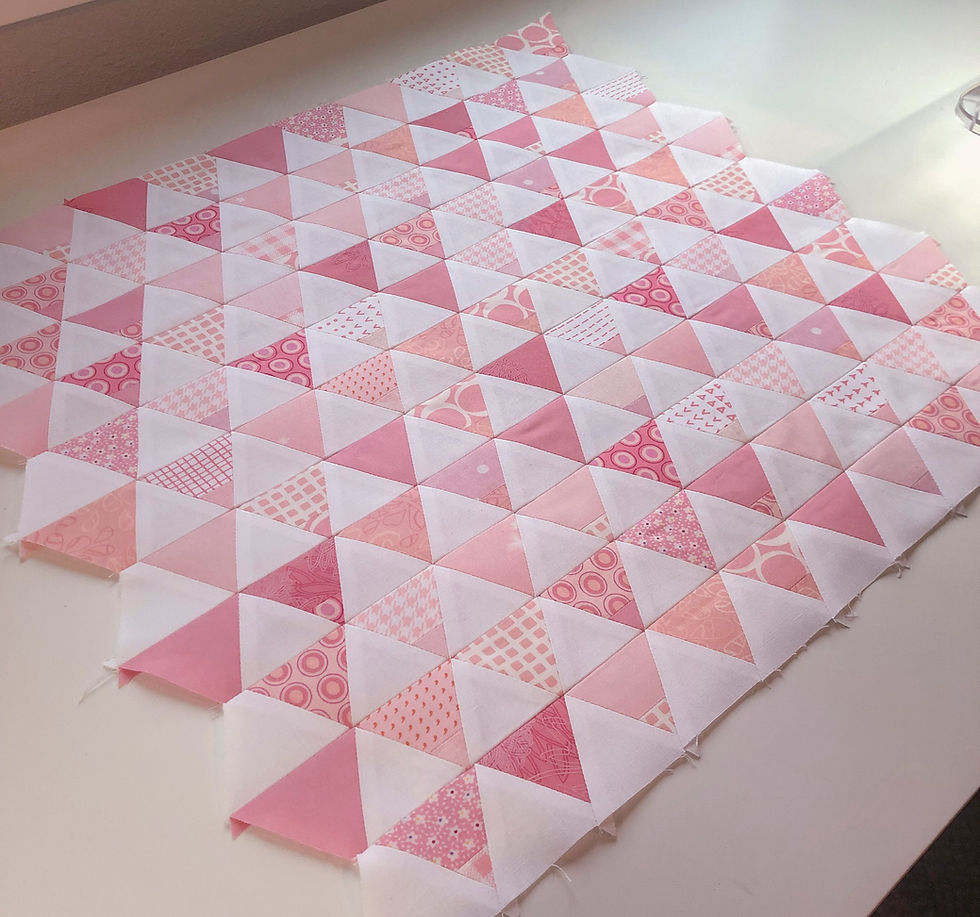

Once the whole pillow top was pieced, I gave it a good press with spray starch to keep all the seams flat.
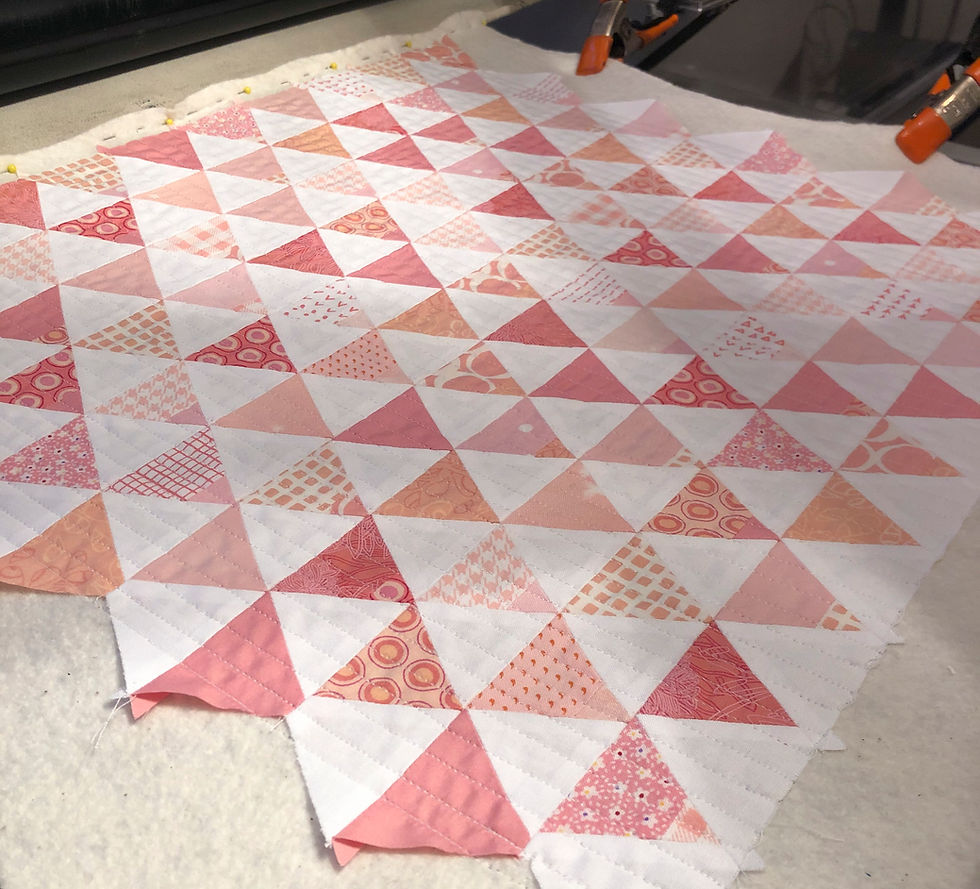
I quilted the top onto a piece of batting with straight-line quilting. I also quilted the pillow back in the same way.
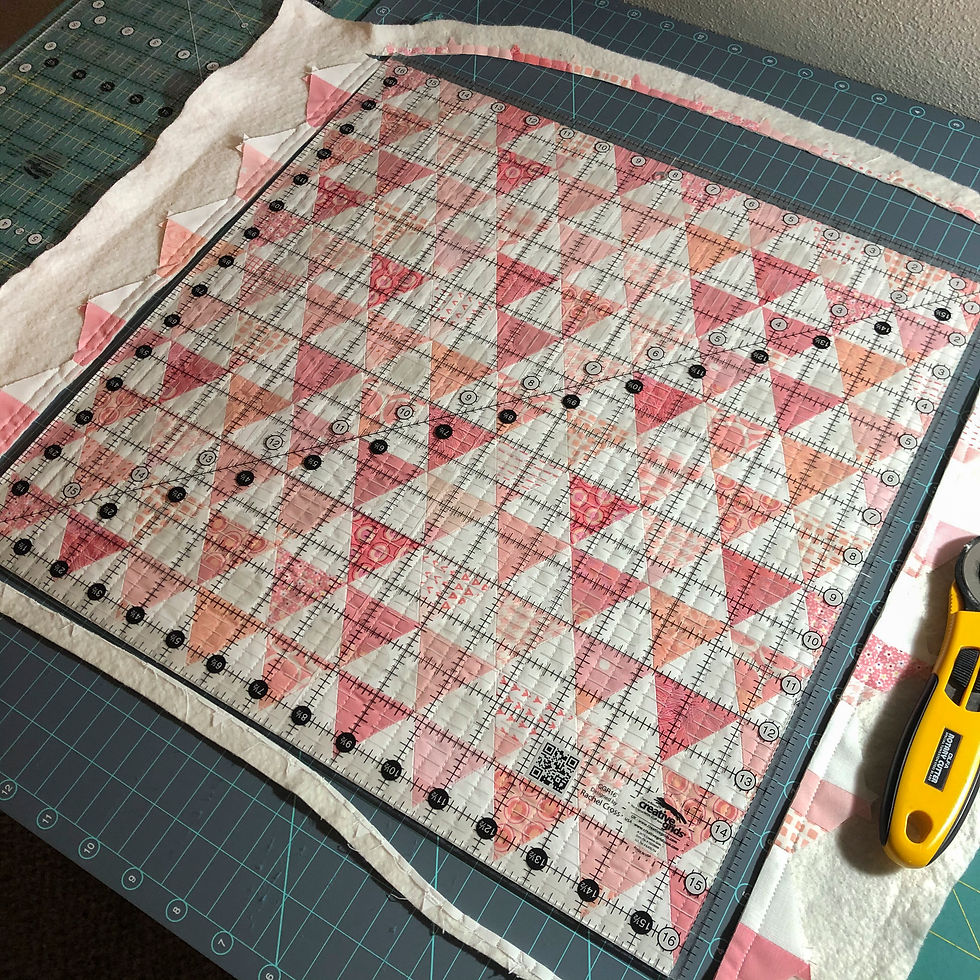

Take a large square ruler, or use the lines on your mat, to trim the whole thing down to 16¼” (repeat with the backing panel).
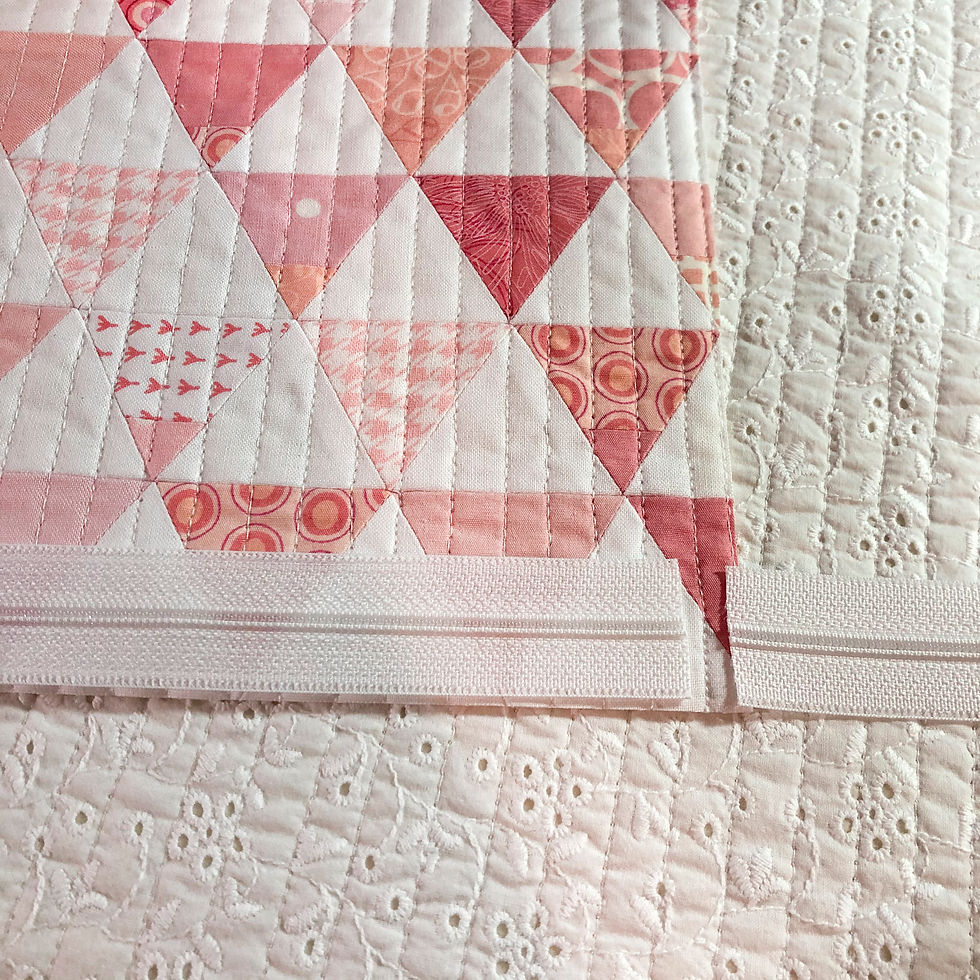
I usually put a zipper opening in my pillows, and here are my simple tricks for doing that! I cut the zipper about 1” shorter than the pillow, so in this case, that is 15¼”. I center the amount to make it about ½” shorter than the pillow on each end.


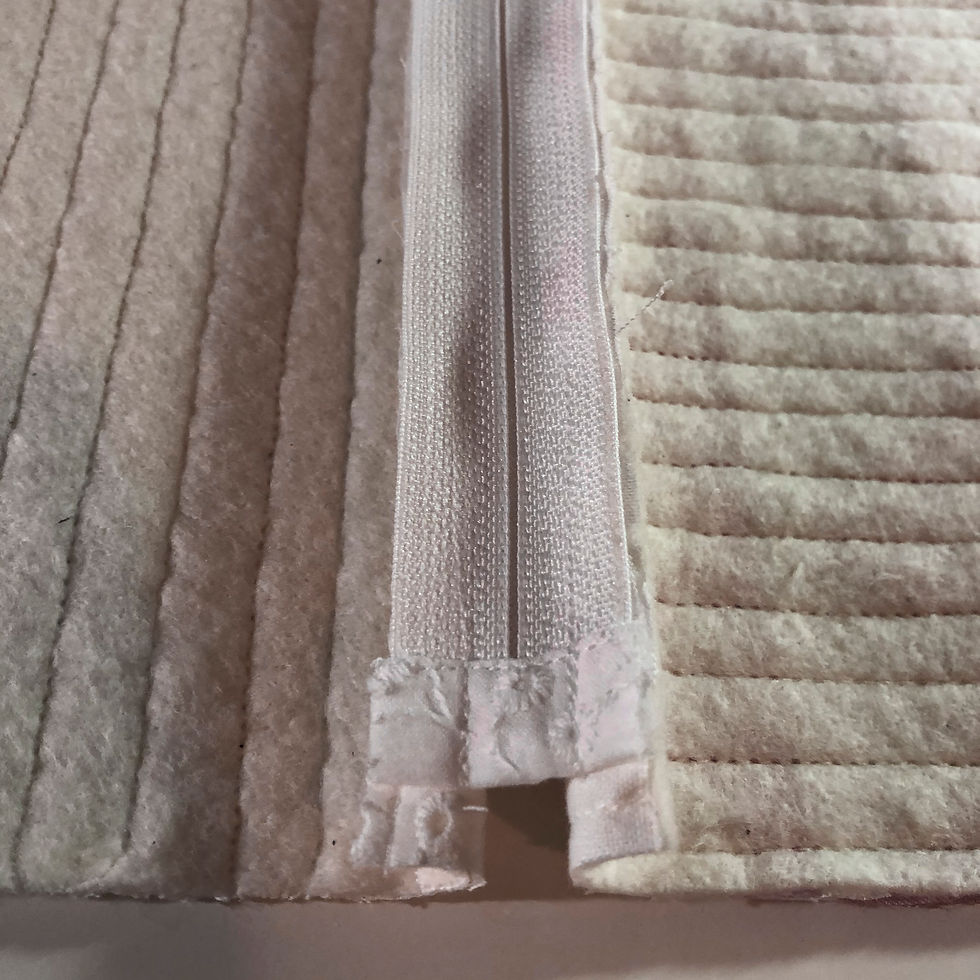
I make a little double-fold tape-like wrap for the ends of the zipper. This will wrap around each end and be stitched down to act as a zipper stop at either end.

I center the zipper and pin it in place, then stitch it along the edge to both the front and back panel.


Once the zipper is in place, I sew the front to the back on the other three sides with a heavy ¼” seam and turn the pillow right side out. Notice how the corners with the zipper have the bound-off ends.
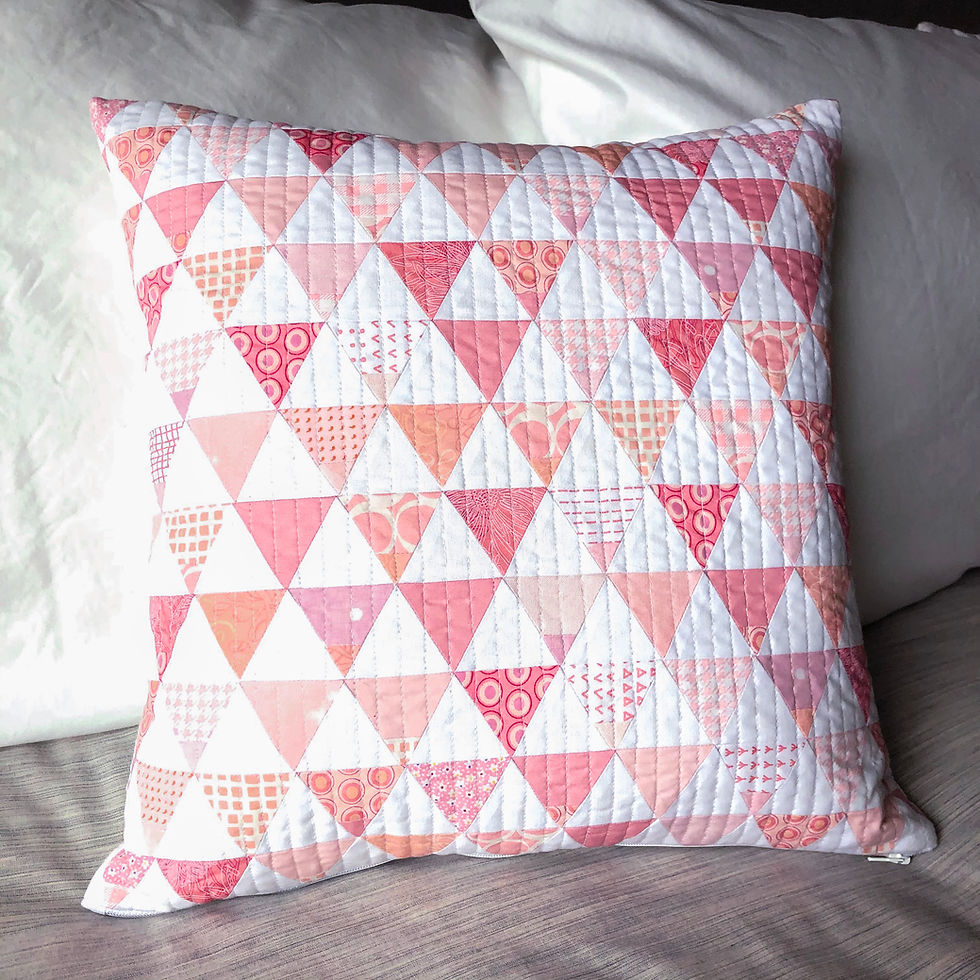


Stuff with a 16” pillow form and you're done!
Happy Sunday everyone,
Krista
Follow all my quilty adventures on Instagram, Facebook, and Pinterest. Visit my Youtube channel for free tutorials and tips. If you like my patterns, you can buy them on Etsy, and here on the website.