Dimensional Dahlia!
- Krista Moser
- Apr 14, 2024
- 3 min read

It’s time to change out the snowflake throw pillows in my living room, now that we are well into spring, haha! This week, I had the idea to make a 3D flower pillow to add some pretty spring blossoms to my collection of pillows.

I like to use up scraps any way I can, so I dug around to find the palest pink scraps in my stash. I didn’t have enough of any one shade, but that makes for an even more lifelike flower. I plan to shade my petals from lightest to darkest.

I cut out of paper three different petal sizes. I made 12 of the largest ones, 6 of the medium, and 6 of the smallest ones. You can print my petal templates here.

Place your lightest outer petal colors, right sides together, and trace twelve sets of the largest petals. Repeat this process with six sets of medium petals of a slightly darker shade(s). Finally, trace six sets of the smallest petals of the darkest shade(s) you use.

Stitch on the two curved sides pivoting at the point, backstitching at the flat bottom edge (leave the flat bottom open for turning).

Cut out each petal with ⅛” seam allowance so the edges aren’t too bulky.

Turn each petal right side out poking out the pointed end with a point turner or other semi-sharp tool. I finger-pressed each petal at this point. I didn’t want to crush the petals super flat by using an iron and finger pressing worked beautifully!

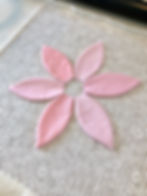
I quilted up a pillow front panel with my go-to straight lines, and without taking it off my longarm I started adding petals. You could do this with a domestic machine in a similar fashion if you dropped your feed dogs and used the darning foot (free-motion foot). Here, you can see the first six large petals ready to stitch.

I stitched down the flat edge of each and then did a curvy line up the middle leaving the last inch or so unstitched. This is where those soft finger-pressed edges really show well.

I added another set of six large petals, overlapping just a little and making the opening in the center of the flower a little smaller. I stitched these petals down in the same way as the first set.
Now for the medium petals. You can see these overlap much more and the opening in the middle is getting pretty small. I stitched these down the same way as before. I was surprised that it didn’t feel all that bulky. I suppose the staggering of the petals is the key to lightening the bulk.
Now for the final set of petals. These are the smallest petals, and I decided to add a little fold to the flat edge of each one. For these, I just stitched the flat edge with its fold down and did not stitch up the middle.

Because of that little fold, these petals curled over a little and laid against the others. I was debating if I should hand tac the outer tips down to hold them in place, but so far they look great as is!
For the center, I decided on a fabric-covered button. I love doing these, they are so easy, and they have such a nice finishing touch. You could use a cute decorative button or any embellishment to cover the center opening.

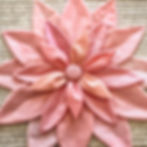
I hand-stitched the covered button down and added my backing to the pillow. The flower came out about 12” across. I made the pillow cover to fit an 18” form.

And here it is! The first edition of this year's spring pillow collection.
Happy Sunday everyone,
Krista
Follow all my quilty adventures on Instagram, Facebook, and Pinterest. Visit my YouTube channel for free tutorials and tips. If you like my patterns, you can buy them on Etsy, and here on the website.


